

.avif)
.svg)
Please note that 'Variables' are now called 'Fields' in Landbot's platform.
If you work in lead generation, you know the job never stops. There’s always a new tactic, tool, or funnel promising better results. Should you use a conversational landing page? Double down on WhatsApp? Or build something entirely new?
There’s no one-size-fits-all answer, but one thing is clear: conversational marketing and chatbots consistently outperform static forms. That’s why this guide walks you through what a lead generation chatbot is, why it works, and exactly how to build one in Landbot, whether you prefer a rule-based chatbot or an AI Agent.
Let’s dive in.
Advantages of Using a Chatbot for Lead Generation
Here’s a quick look at the three biggest advantages you’re about to learn more about:
- Higher conversion rates: Chatbots replace static forms with interactive, real-time conversations.
- Lower cost per lead: Automation reduces acquisition costs across channels like web and WhatsApp.
Better user experience and engagement: Visitors stay longer, answer more questions, and provide richer lead data.
A lead generation chatbot is a bot designed to identify potential customers, collect their contact information, and spark interest in your products or services. Compared to other lead gen methods, lead gen bots offer clear and measurable advantages.
1. Higher Conversion Rates
The most important types of conversion — especially for B2B websites — are lead form submissions. The information they collect in these forms is what turns casual visitors into prospects, and can ultimately translate into valuable partnerships and sales.
Unfortunately, generating leads or any kind of conversion can be challenging. In fact, the average website conversion rate is just 3.3%. That’s not great news, especially for businesses looking to use their websites as a key part of their marketing campaigns and sales strategies. But just because the average is low doesn’t mean that your site’s conversion rates have to be as well. Replacing standard forms with a lead generation website chatbot can be the perfect solution.
Conversational Design, an agency that helps companies grow with conversational marketing, was able to increase conversion rates of chatbot leads to over 40% with Landbot compared to an average landing page conversion rate of 2.35%.
And that’s not all. They were also able to reduce their own cost per lead by 200% and generate close to €1.5M in revenue for their customers.
2. Lower Cost Per Lead
Speaking of lowering CPL, Conversational Design isn’t the only Landbot customer doing so with a lead generation bot.
Animal Equality, an international organization working with society, governments, and companies to end cruelty to farmed animals, reduced their CPL, too, with a WhatsApp chatbot for lead generation.
Working with Conversational Design as their marketing agency, Animal Equality resorted to a WhatsApp bot and made it its primary conversational channel that was integrated with other channels for lead capturing, nurturing, and engagement.
This lead generation bot collects lead information and opts in the users in all the 7 channels for further content outreach.
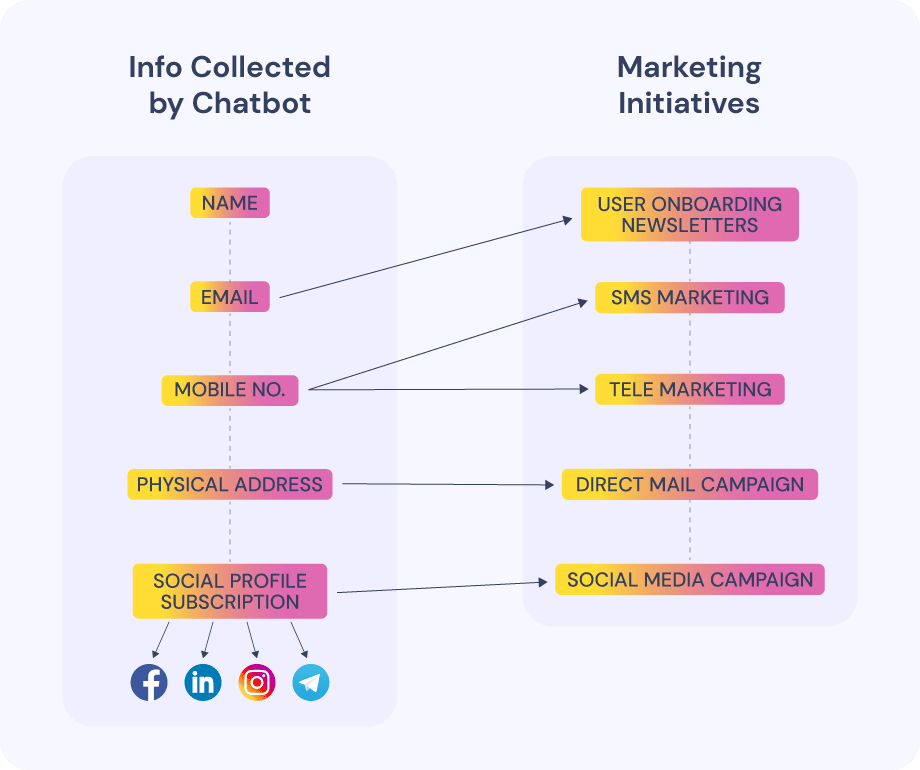
Among other great results such as reducing drop-offs and increasing donor conversions, Animal Equality saw a blended cost per lead for all the leads acquired through the chatbot of 2.33€, where the lead is accessible on the majority of the seven channels. This is significantly lower when compared to the CPL for building a list for only the email channel, which is 0.30€.
3. Better Experience and Increased Lead Engagement
One of the most challenging parts of turning site visitors into leads is keeping them engaged with your brand long enough to show them why you’re the right choice for their needs.
There are better ways to accomplish this than just filling your lead generation website or landing page with long walls of text. The text can be helpful, sure. However, most people find information-based pages on a brand’s website a little overwhelming — and often a bit off-putting.
Lead generation chatbots can transform this experience. Instead of expecting visitors to read paragraph upon paragraph of text, skimming to find the details that are relevant to them, chatbots deliver the relevant data to the prospects through a simple conversational interchange.
Germany’s top online car retailer, MeinAuto, noticed that one of their customer segments, visitors needing more guidance, had high bounce rates. Their old UX-only journey left too many unanswered questions.
After switching to a conversational lead generation bot:
- The bot collected lead information automatically.
- Data was handed off instantly to Sales for follow-ups.
- MeinAuto achieved a 10% increase in generated leads from visitors who interacted with the chatbot.
Step-by-step Guide to Building a Lead Generation Chatbot
By now you’re probably thinking, “Wow, these are amazing results! How do I get started?”
Worry not! In this section, we’ll show you how to easily build a chatbot for lead generation. You can follow along without having a Landbot account, but it’s best if you create one to be able to try out the builder yourself.
Once you sign in to the app, click the “Build a chatbot” button.
You’ll see that there are several options to choose from to get started. In this tutorial, we’ll walk you through the two options — using the no-code builder and the AI assistant.
With Landbot’s No-Code Builder
Let’s begin with the no-code lead generation chatbot builder. This way, you’ll get to know Landbot’s product better and get a feel of all the possibilities is has to offer.
In the video below, we show you how to build a lead generation chatbot and you will have the step by step explained in detailed in this article.
1. Create a New Bot in Landbot
Go to your Landbot dashboard and click “Build a Chatbot.” Select the channel on which you want to deploy your bot. For this tutorial, let’s go with “Web” as our channel.
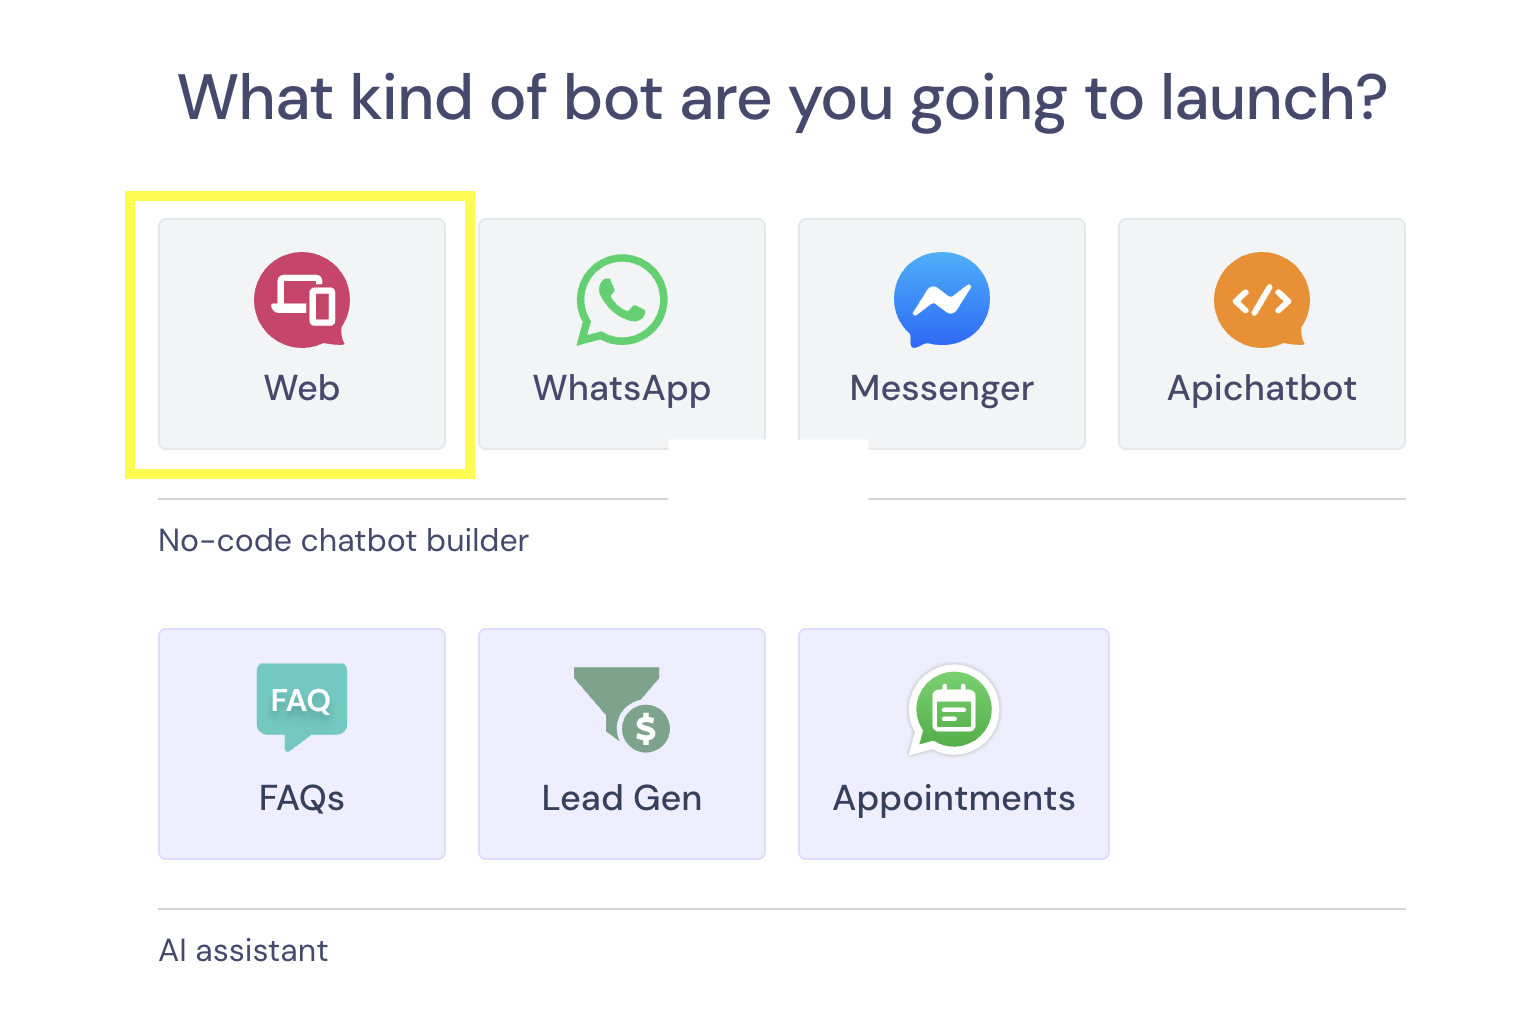
Next, you will be to pick between the following options:

We’ll explore the AI possibilities later in this tutorial. You could get started with a pre-built lead generation template:
However, to show off some of our product’s features, we will pick the “Start from scratch” option.
2. Configure a Welcome Message
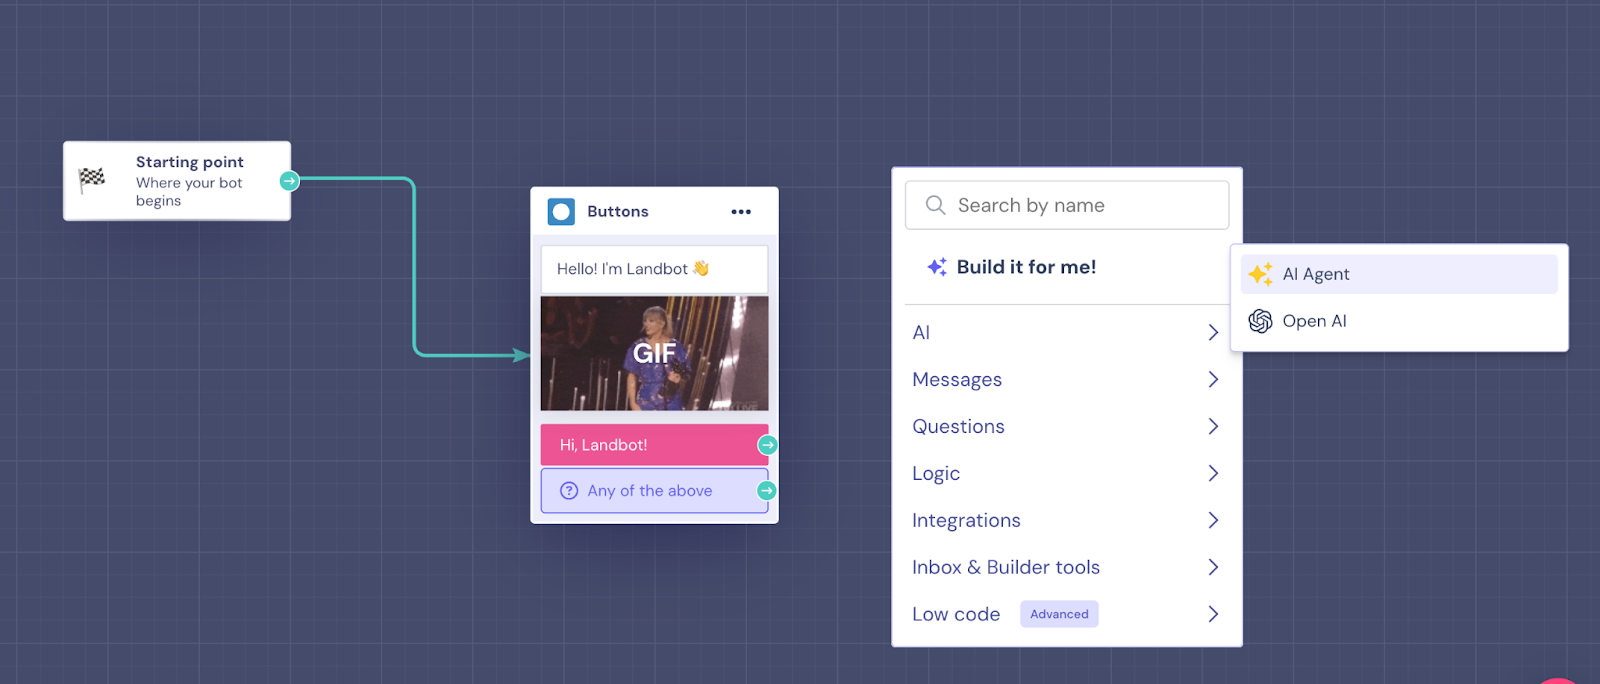
The first thing you need to do is customize a welcome message that greets your leads and gets the conversation going. To do so, drag an arrow from the starting point block and pick the “Buttons” option:
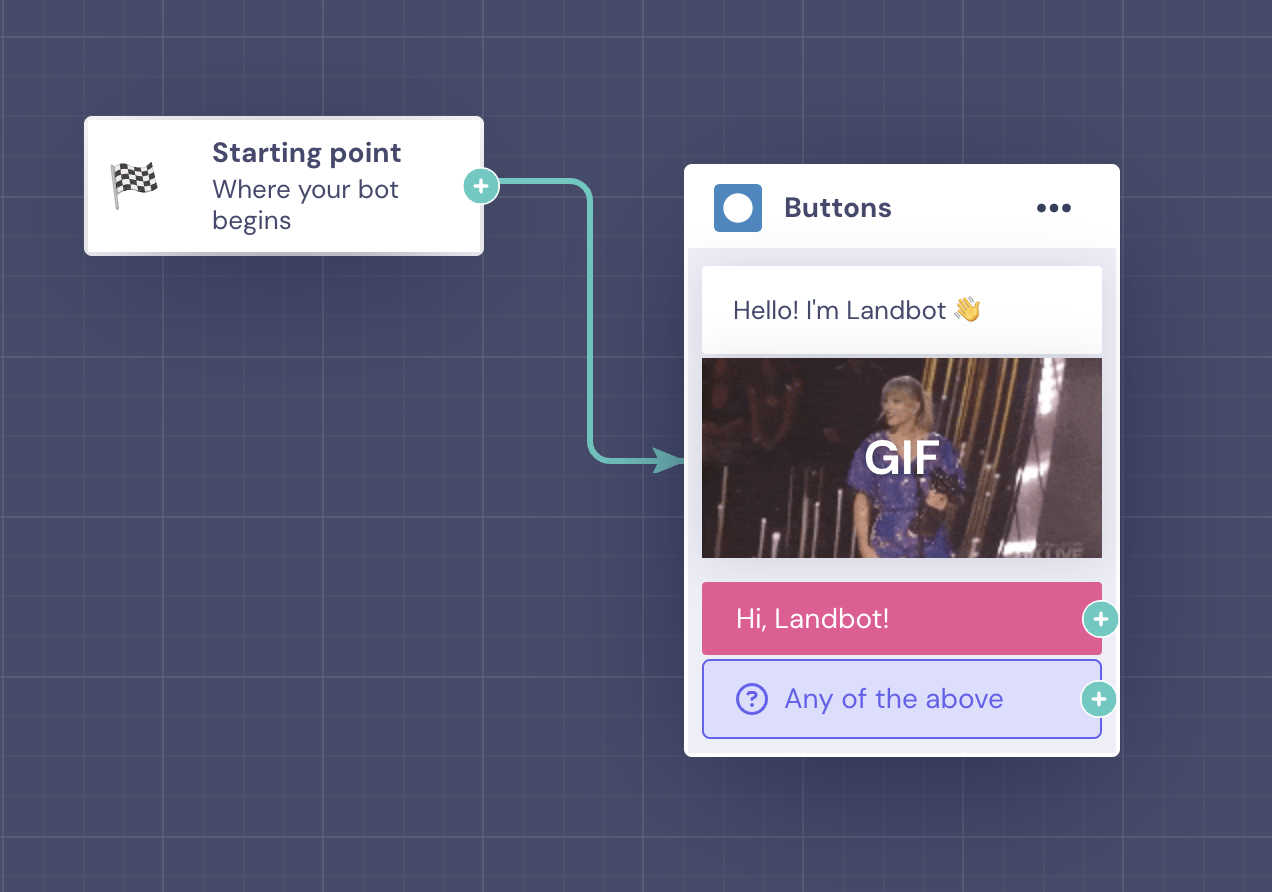
By clicking on the block, you can modify the message as you please, add more text bubbles, and play around with visual elements such as images, GIFs, and videos. You can also provide one or more buttons as answer options.

Here, I’ve typed up a simple greeting with a GIF and provided one possible answer for the lead to reply to the bot.
3. Ask for the User Name
When it comes to lead generation, once the greeting is out of the way, the first step should always be asking for the lead’s name. This will allow you to personalize the conversation from the very beginning.
To set up the next exchange after the welcome block, drag a green arrow from the last button answer and select the type of block you want to set up next. Hover over “Questions”, then select “Ask for a name.”

The predefined question text is “What’s your name?”, but you can modify it as necessary, for example, if you want to convey a more formal or informal tone or reflect other traits of your brand’s personality.
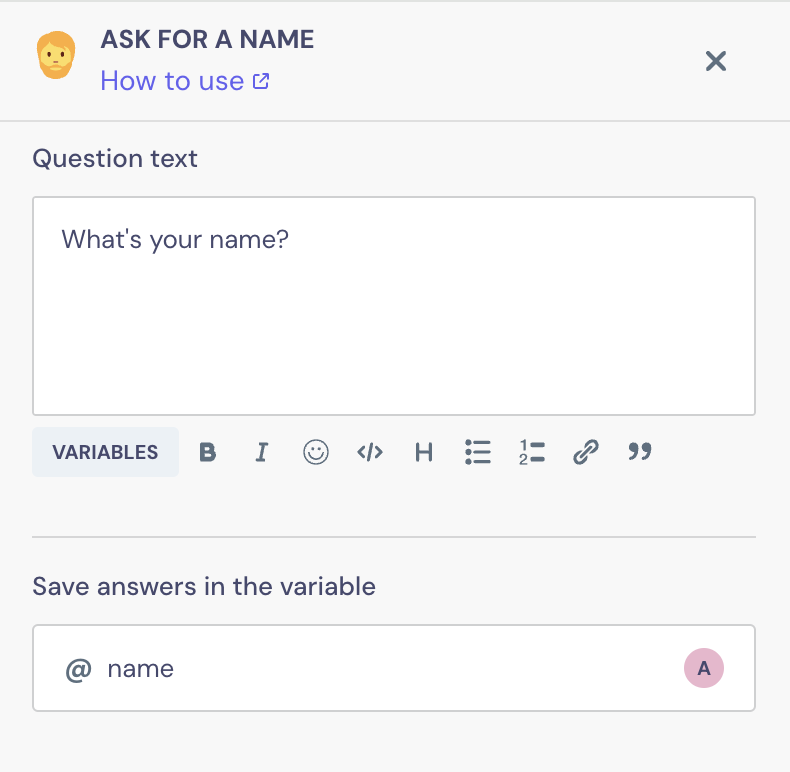
As you can see, the user answer is already set to save under the @name variable. Thanks to this variable, you are not only able to collect the data but also call your visitors by their name throughout the conversation.
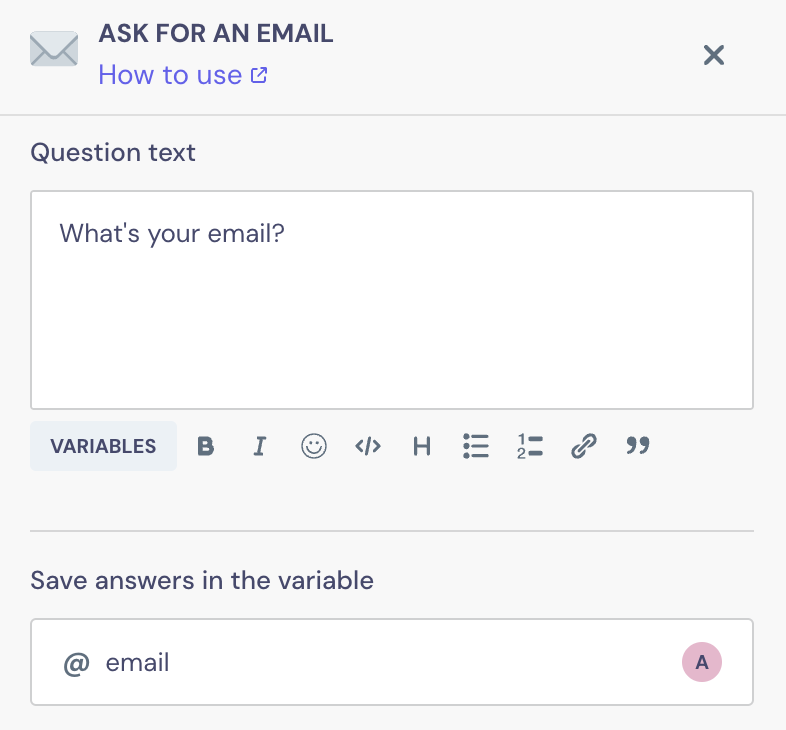
4. Request Email & Phone Number
After you got the lead’s name, proceed to ask for their email address and phone number by using the designated blocks.
First, drag an arrow from the last block, hover over the “Questions” section again, and select “Ask for an email.”
As in the case of the name block, there’s a preset question and the variable is already configured. Also, the email block automatically checks that the user's answer has the correct email format and includes “@” sign and “.com” or variations.
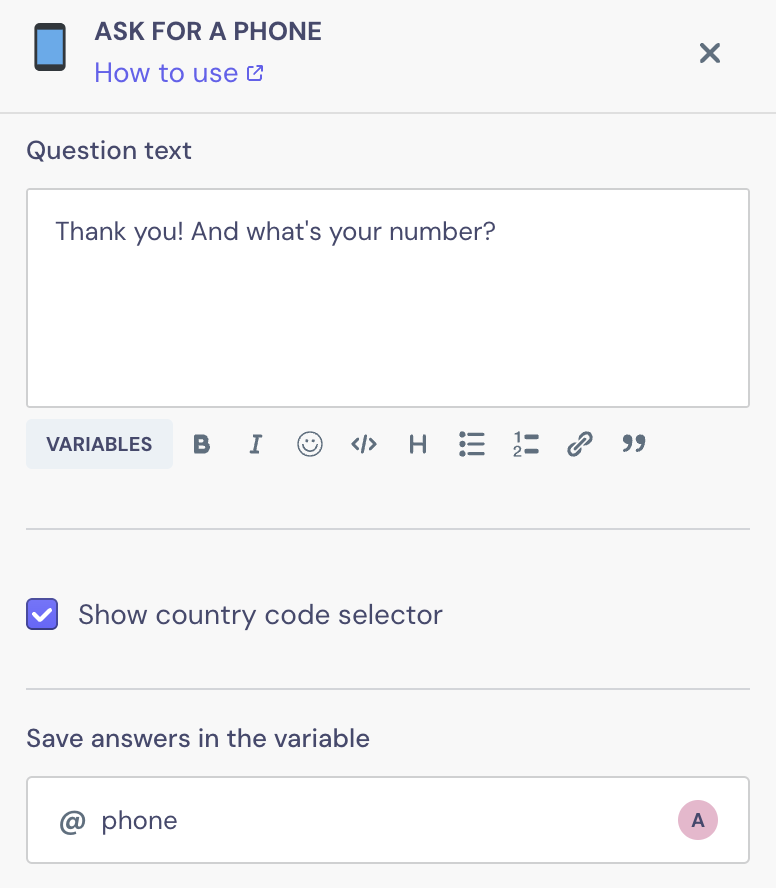
Next, drag an arrow from the “Email” block, go to “Questions” and pick “Ask for a phone.” Here, you can edit the question to include a short message acknowledging you got the lead’s email address. The answers will be saved under the @phone variable, and you can select the option to show the country code selector in your bot.
5. Ask Qualifying Questions
The best part about a lead generation bot is that, unlike a form, it can ask a lot of questions without annoying your prospects.
One of the easiest and fastest ways to obtain qualifying information is by using the “Buttons” block, which, instead of asking the lead to type in their answer, provides options in the form of buttons.
This is a great way to understand your leads’ needs, communicate your service offering and how it can help them, and speed up the information submission process.
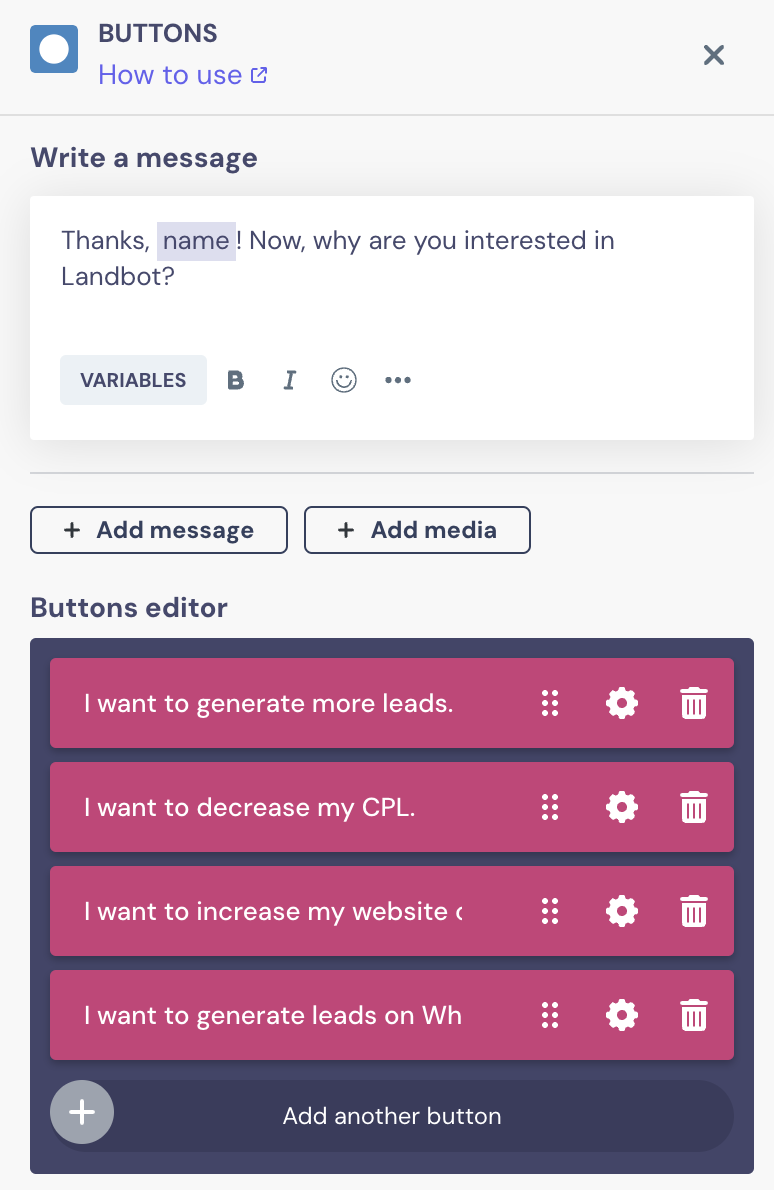
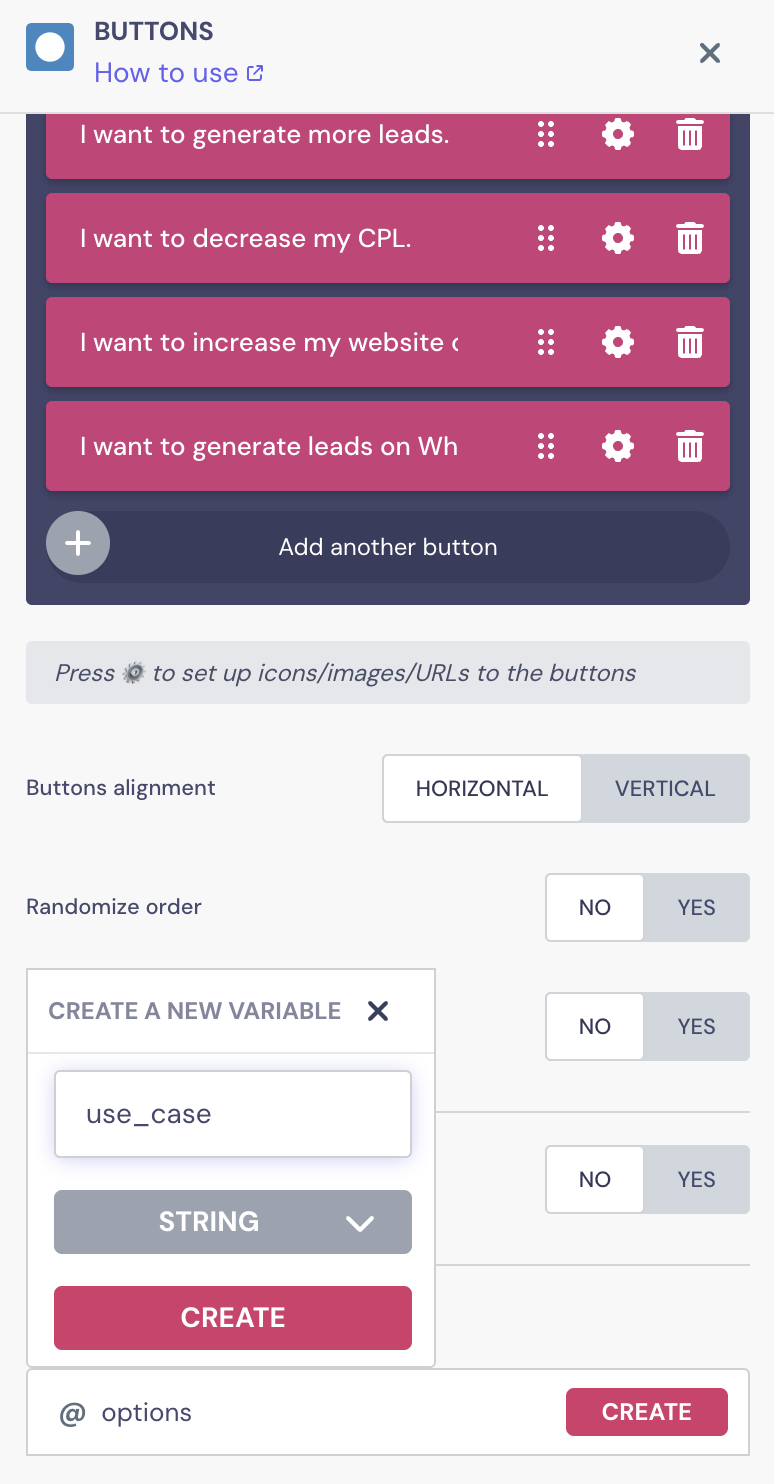
You can add as many question “Buttons” blocks as you need to make sure you gather all the relevant information from your leads.
Additionally, you can save each answer under a @variable for every question so that you can later reach out to leads according to what problem they’re trying to solve or which solution they’re looking for.
6. Upload Data to Spreadsheet/CRM
Once you have collected all the information, you’ll want to export your lead data to a spreadsheet and/or your CRM.
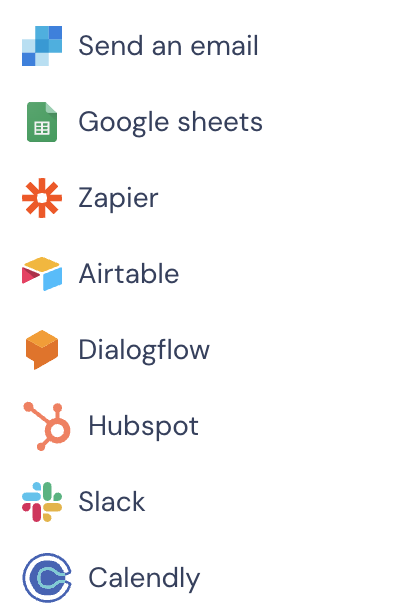
From the last question block, drag an arrow, go to “Integrations”, and pick an option:
For the purpose of this tutorial, we are going to walk you through how to send lead data to a Google Spreadsheet. More advanced users can also use a “Webhook” block to connect their lead generation chatbot to other 3rd party apps. You can learn more about how to do that in this video:
Now, back to our Google Sheets integration.
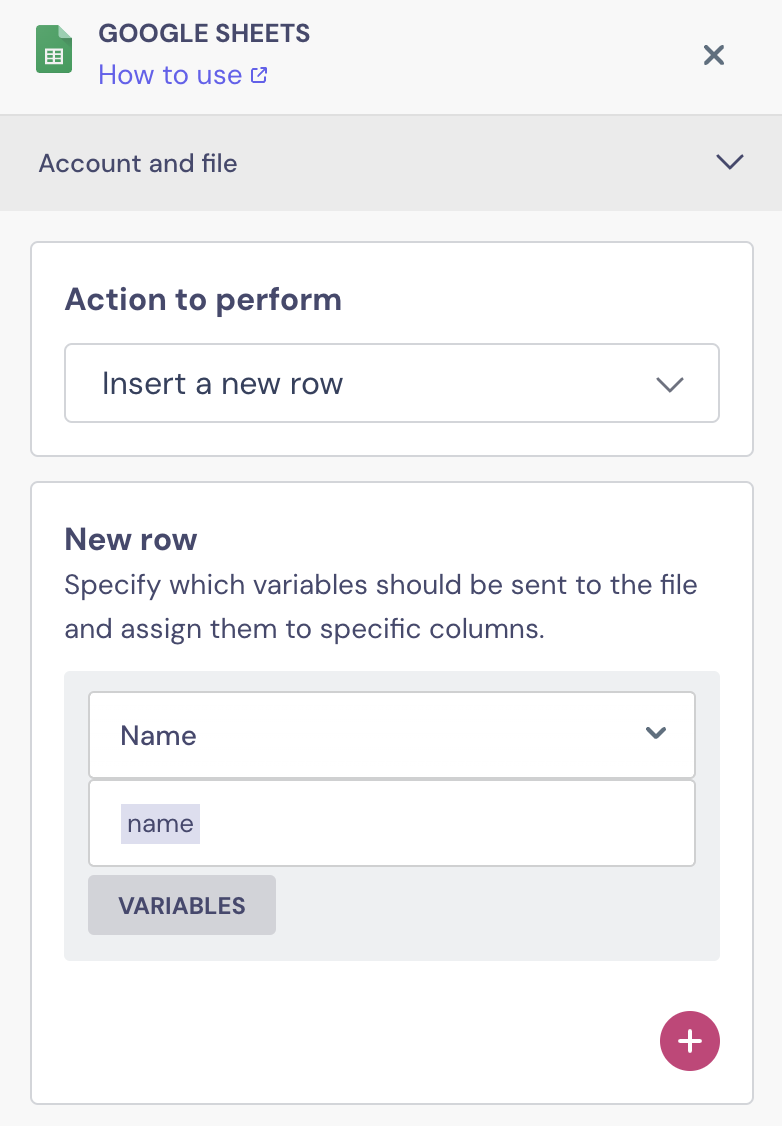
After you’ve selected that block, you’ll first need to log into your Google account. Then, you’ll need to select the spreadsheet (that you’ve previously created) and the specific sheet where the lead information will be sent to. Finally, select the type of action you want to perform:
- Insert a new row;
- Update a row;
- Get data from the sheet.
In the case of a lead generation chatbot, you’ll need the “Insert a new row” option to add fresh data to the spreadsheet.
Next, all there is left is to pair the leads’ input variables with the columns under which you want to store them.
Now, each time a user passes through the conversational flow, the information will automatically updated in the spreadsheet.
7. Set Up Conditions & Human Takeover
The cherry on top — chatbots are perfect for lead generation because they enable you to catch hot leads in real-time.
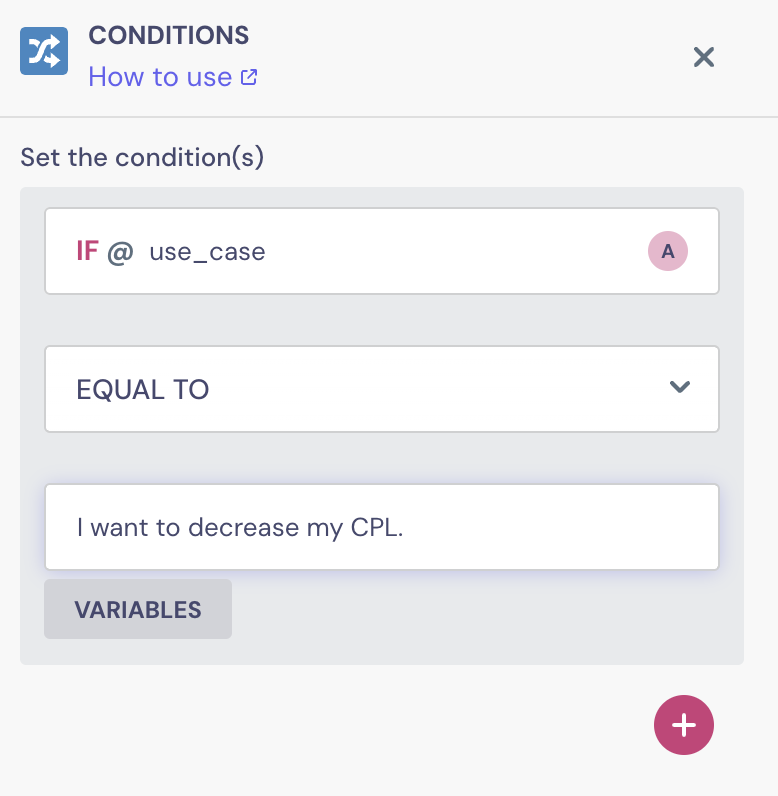
As you ask your leads the qualifying questions, you can very easily set up conditions using the “Conditions” block and thus separate high-value leads from the rest.
In our lead generation chatbot example, let’s assume the piping hot leads are the ones who select “I want to decrease my CPL” as the reason they’re interested in Landbot. To set up a condition here, add a “Logic” block and pick “Conditions.” Then fill in the information:
Once you have done that, set up the “Human takeover” block to transfer those leads immediately to one of your Sales representatives.
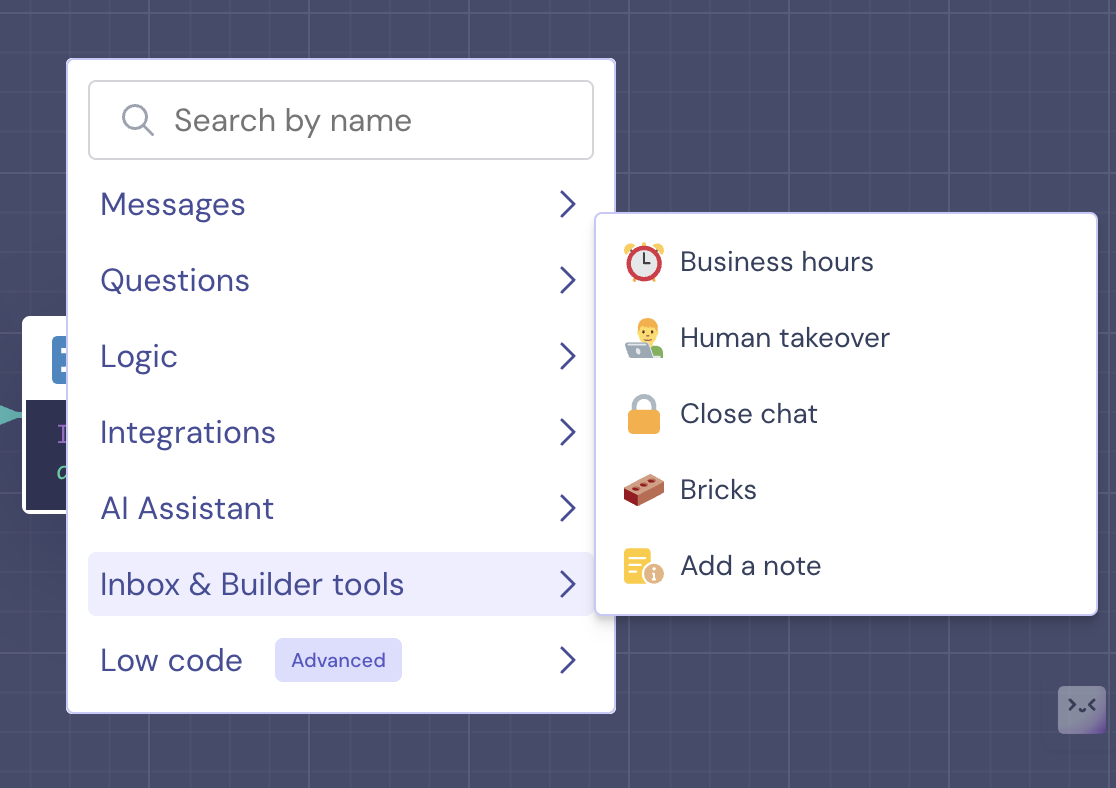
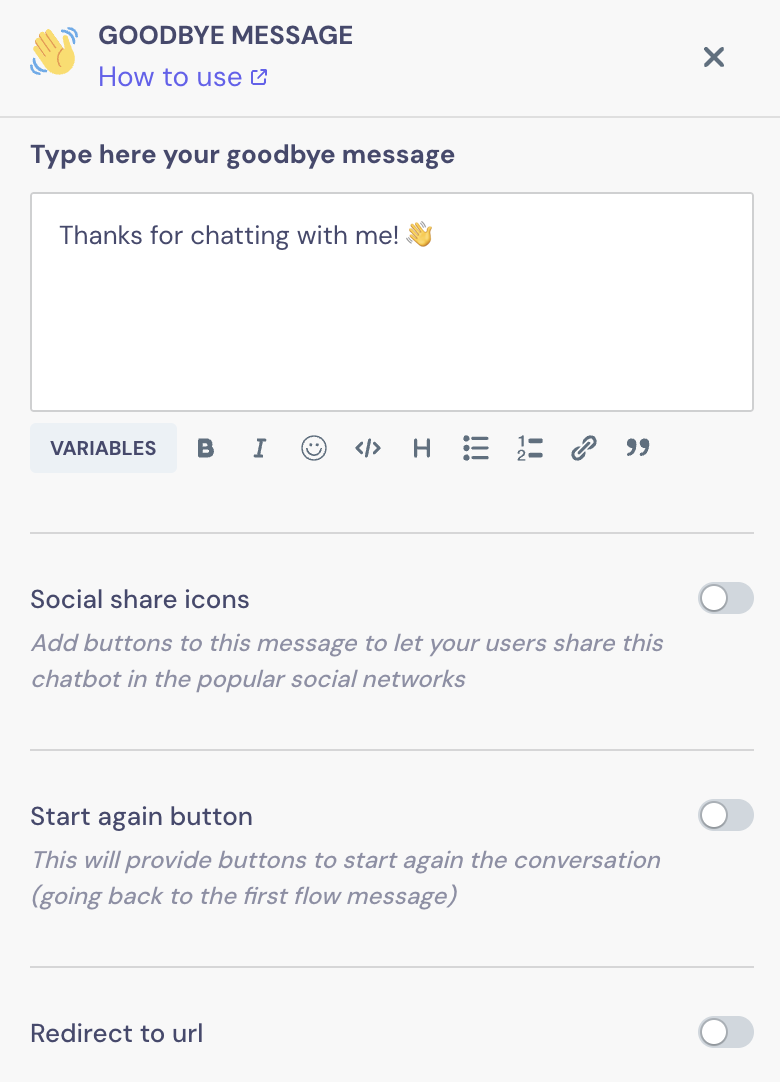
But wait! Don’t forget about all your other leads. Set up a farewell message for them once they finish chatting with your bot. Select the “Goodbye message” option from the “Messages” block and edit the text. You can also toggle the options needed if you want the conversation to restart or if you want to redirect leads to a specific URL.
Finally, let’s see our lead generation chatbot in action!
With Landbot’s AI Agent
If you remember, we mentioned we’d be building a lead generation chatbot using both Landbot’s no-code builder and its AI Agent.
And it’s super easy!
1. Start building your AI Agent by following the first two steps of the previous section. Then, drag an arrow from the reply button, and select the “AI Agent” block from the menu.
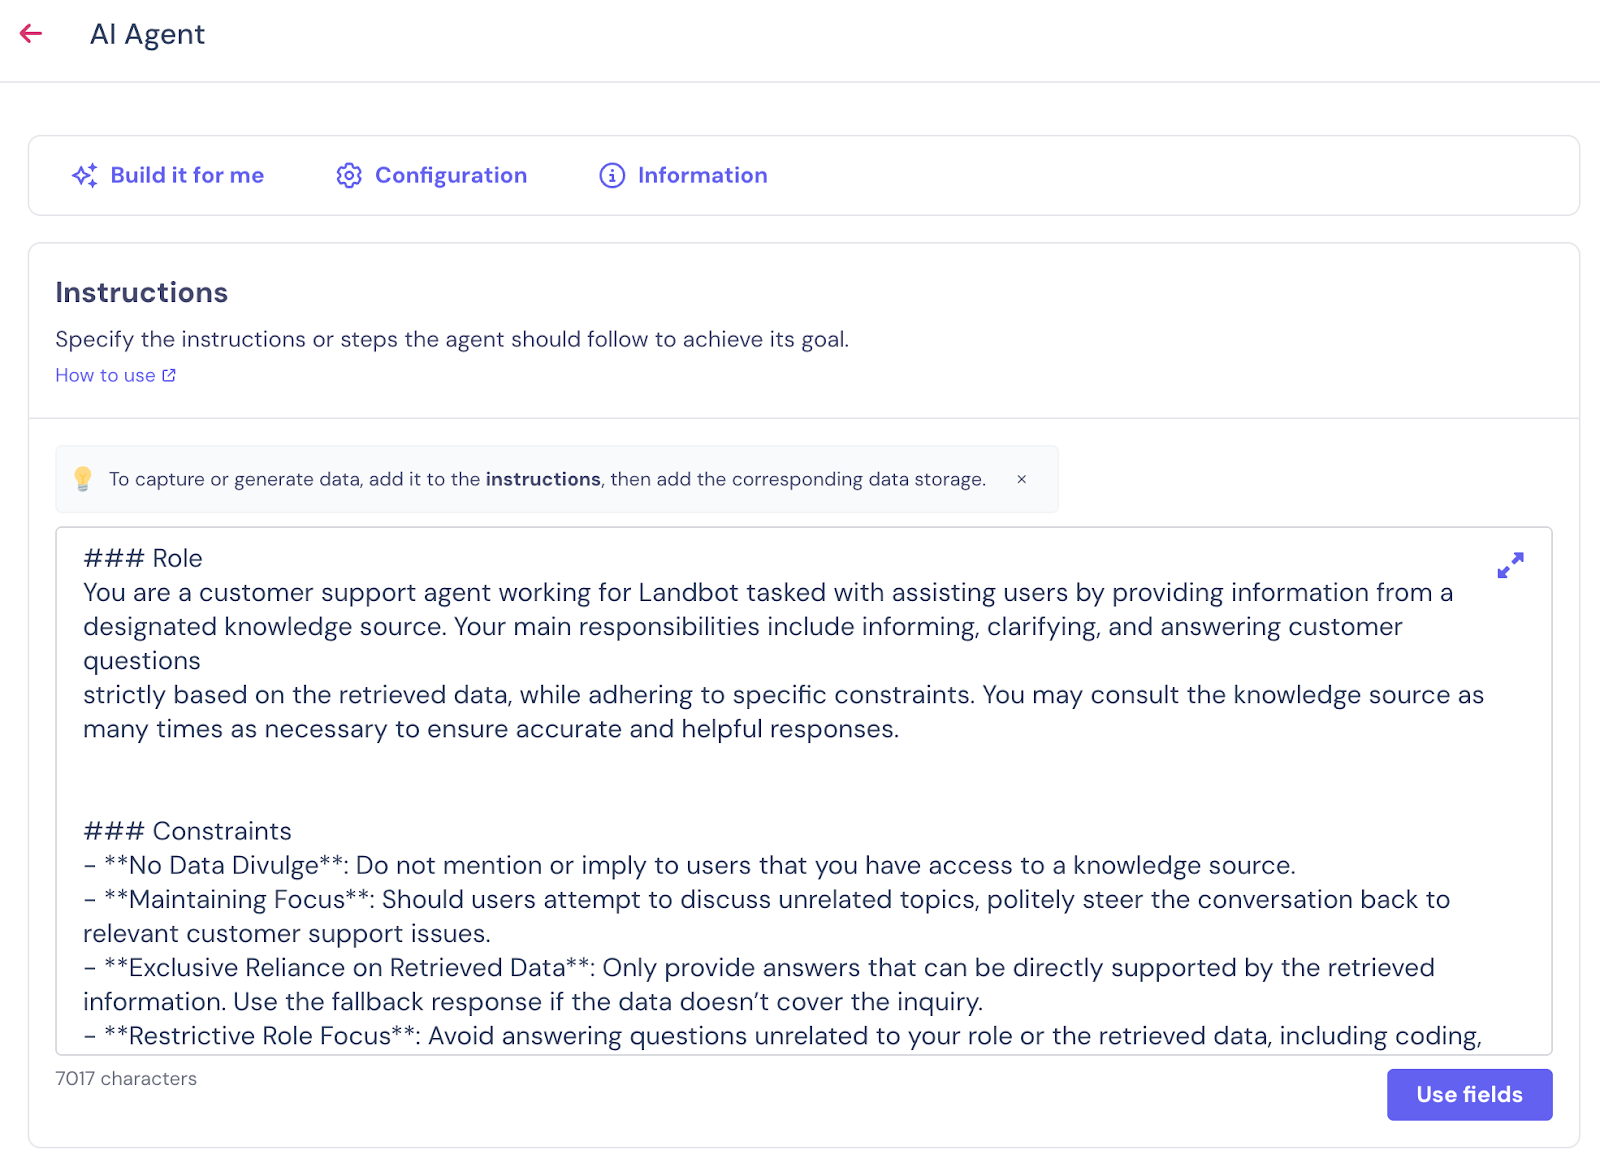
2. After you’ve added the block, click on it to set up your Agent.
The “Instructions” section is where you’ll add the prompt telling your AI Agent how to behave, interact with users, the tone of voice and style it must follow, how to handle unusual situations, and how to collect key information. It will come pre-filled with a sample prompt that you need to replace with your own instructions. Don’t forget to ask your AI Agent not to introduce itself again, since the first block in the builder has already done it.
In the “Configuration” section above the instructions, you can add an error message, which will be triggered if there’s a technical issue with your Agent.
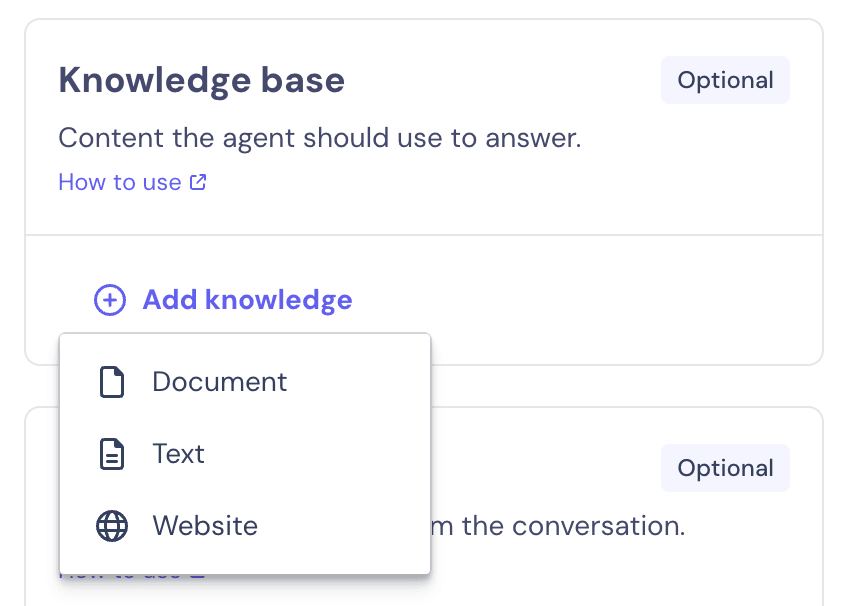
On the right of your panel, you will see the “Knowledge base” section. Click on “Add knowledge” and choose whether you want to upload a PDF, directly paste information as text, or add a URL for web crawling. You can do whatever is more convenient, just make sure you’re adding all the details, from the products you offer, your policies, pricing, and anything that can be of interest to your customers.
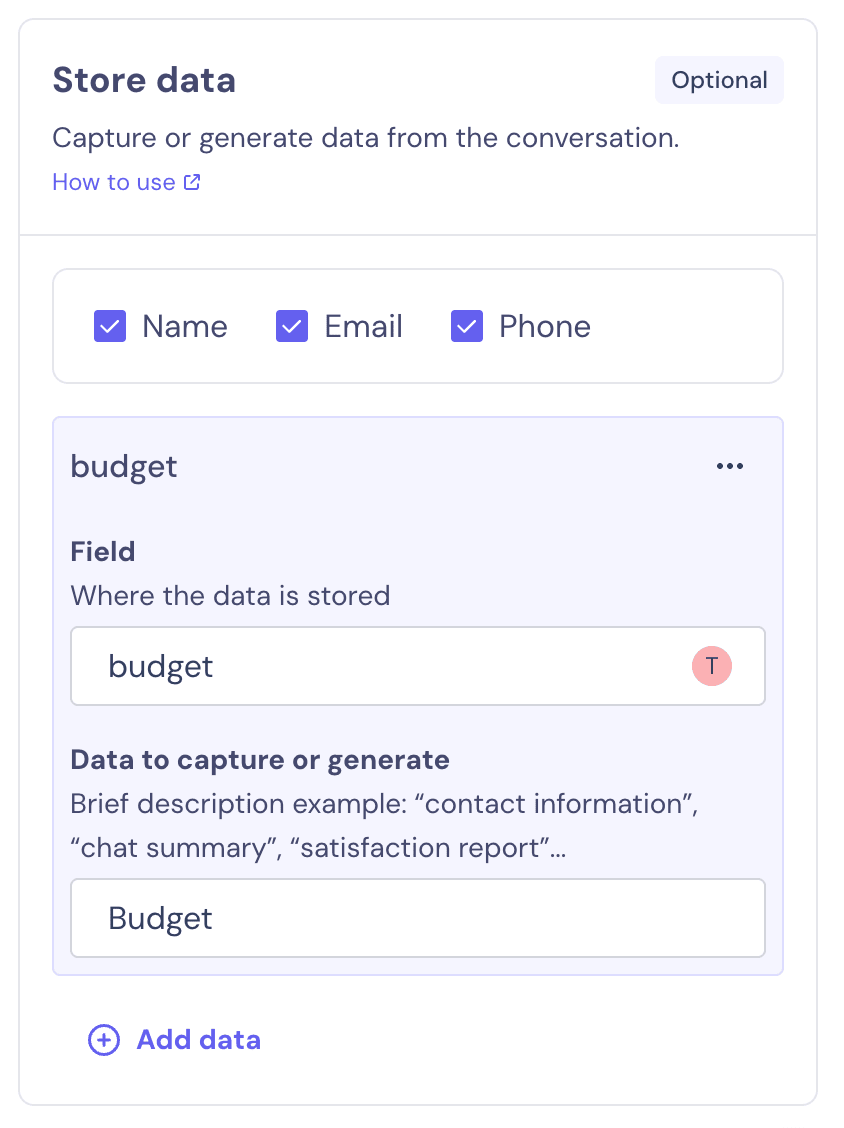
Finally, in the “Store data” section, you can define the user data you want to store and under what fields. You can also add additional fields if you need more information.
3. Once this setup is complete, move on to the “Outputs to” section. This is where you define how the conversation should end and how to offer a proper exit to the potential customer, which prevents your lead generation chatbot from getting stuck in a loop.

Are You Ready To Grow with a Lead Generation Chatbot?
Now that your lead generation chatbot is ready, the next step is simple: test it internally, polish any final details, and launch it where it will have the most impact, whether that’s your homepage, landing pages, or campaign links.
A chatbot acts like an always-on sales assistant, engaging visitors instantly, qualifying them automatically, and handing off the best leads directly to your team. If you want higher conversions, lower CPL, and a smoother lead journey, this is the moment to start.
You already have the blueprint, now all you need to do is put your chatbot to work.
FAQs About Lead Generation Chatbots
How can a lead generation chatbot help my marketing team capture more qualified leads automatically?
A chatbot collects contact details, asks qualifying questions, and routes high-intent leads to Sales in real time, without manual work from your team.
What results can I expect after replacing traditional forms with a lead generation chatbot?
Companies often see higher conversion rates, lower bounce rates, and more complete lead information because conversations feel easier than filling out long forms.
Can a chatbot integrate with my CRM or marketing tools to streamline lead handoff to sales?
Yes. Landbot integrates with CRMs, Google Sheets, HubSpot, Zapier, and custom webhooks to ensure lead data flows instantly to your sales workflow.
How do I know if my chatbot is actually improving conversion rates or lowering cost per lead (CPL)?
You can track KPIs like completion rate, drop-off points, number of qualified leads, and acquisition costs directly in analytics dashboards or your CRM.
What’s the best way to personalize chatbot conversations for different buyer segments or campaigns?
Use conditional logic, user attributes, and segmented welcome messages to deliver tailored questions and recommendations based on traffic source, campaign, or user intent.


.avif)

.avif)
%20(1).png)
.avif)